Quickie Breakfast : Rava Dosa

As a child I remember having competition with my elder brother as to who would eat more rava dosas. I just love rava dosas and relive those days each time I make rava dosa for breakfast.

This time my hubby topped it up with making a heart shaped dosa for me making this dish even more special.

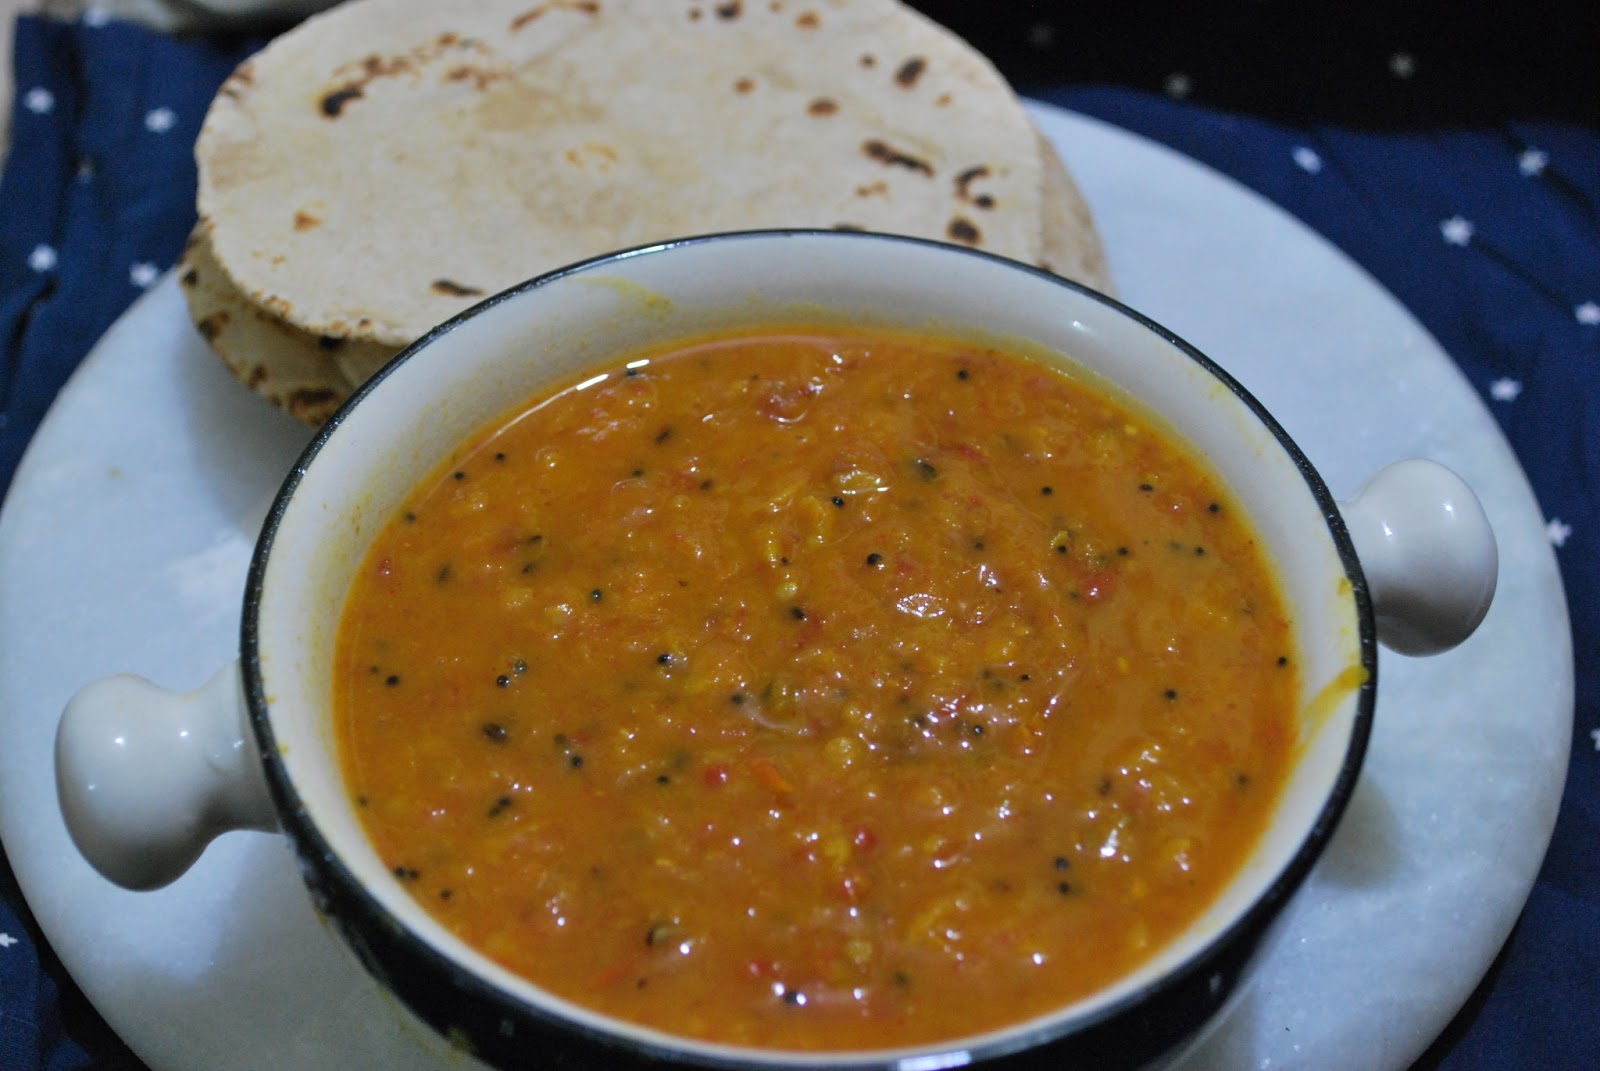
Rawa Dosa is very simple to make and with a simple spicy coconut chutney, can transport you to seventh heaven.

Preparation Time : 10 minutes
Cooking time : 5 minutes or less

Ingredient (Serves 4) :

  1. Rawa - 1/2 cup
  2. Maida - 1/2 cup
  3. Rice flour - 1/2 cup
  4. 1 medium onion chopped
  5. jeera/cumin seeds - 2 tbsp
  6. black pepper corns - 1 tbsp
  7. cashew bits or halves - 3-4 tbsp
  8. Coriander leaves - chopped optional
  9. Oil - 1 tbsp
  10. Salt to taste
  11. Water
How I made it:
  1. Mix the rawa, maida and rice flour with sufficient water such that the water is about 1 inch above the solids. Don't worry you don't need to get this right at first go. You will see as you read through.
  2. Leave that aside for an hour or so. The solids would settle at the bottom. Ensure now that the water level is at least 1 inch above that of the solids. This adjusts the thickness of the dosa. More water makes it a paper thin roast.
  3. Add the chopped onions, green chillies, chopped coriander, pepper corns. If the cashew bits are roasted, add them as is, else add them in the next step.
  4. Heat oil in a takda pan
  5. Put the jeera and cashew bits. 
  6. Once the jeera is crachling and cashew bits are light brown, add to the dosa batter mix. 
  7. Adjust the salt.
  8. Now, heat a flat pan or tawa.
  9. Pour a ladleful of the dosa mix and swirl it around on the pan, taking care not to let it drop off the sides of the pan/tawa.
  10. Cook on high heat till it starts to brown. 
  11. Flip it over and cook for about 30 seconds.
  12. Serve hot.
Make sure you serve these with a spicy chutney.

Tips :
  • If the dosas are sticky, could be that the maida is more so reduce the maida and replace the reduced quantity with rice flour. 
0

Carrot and Onion Paratha

So what do you do when both you and your better half wake up at 3am? Well, it is gonna be a nice and sunny day so we decided to go for a trek at Shakespeare Regional Park. The gates open at 7am so since I a little time on my hands, I decided to make these quickie parathas to take with us as trek grub.

Preparation time : 10-15 minutes
Cooking time : 4-5 minutes for each paratha

Ingredients (makes 6 parathas) :

  1. 1 cup whole wheat flour
  2. 1/3 cup chopped onion
  3. 1/2 cup grated carrots
  4. 1 tbsp jeera/cumin seeds
  5. 1 tbsp kasuri methi
  6. 1/2 tsp red chilli powder
  7. 1 green chilly finely chopped
  8. 3 tbsp oil
  9. Salt to taste
  10. Water to knead the dough
How I made it:
  1. In a pan, heat up 3 tbsp oil.
  2. Put in the jeera seeds.
  3. Once they crackle, put in the kasuri methi
  4. When the methi begins to get brown, don't let it burn, throw in the onions and green chillies.
  5. Fry till onions start to become soft.
  6. Throw in the carrots, red chilli powder and salt. 
  7. Remember to add a little more salt as the wheat flour will also be added.  So when tasted, this mix should taste a little salty - not too salty.
  8. When the carrots are turning soft, turn off heat and wait for the mix to cool.
  9. When cool, add the flour to the mix and knead into a soft dough.
  10. Separate the dough into 6 balls of uniform size.
  11. Roll out each ball into a circle and for each circle repeat steps 13 onwards.
  12. Heat a flat pan/tawa.
  13. Place the circle. Cook for 30-40 seconds.
  14. Lower heat to medium and turn the parata.
  15. Add a few drops of oil to help the parata cook and remain soft.
  16. After a minute or so, if there are enough brown spots on the paratha, turn the paratha and make the heat back to high. 
  17. Add a little more oil and cook till there are enough brown spots on both sides. Take off heat.

Serve hot with raita or pickle or pack and carry on a trek. Can be eaten as is.

All packed and set to go.


Here's a pic of the beautiful place - a must visit. Do check out my review of the place which is coming up on the blog soon.

0

Classic Combo : Rasam and Pepper Chicken

So a friend of ours is down sick with a cold and bad throat. We were headed towards his house to visit the #RBTGP and therefore decided to drop in on him and give him some rasam. For dinner, we added the pepper chicken to have a classic South Indian Combo : Rasam and Pepper Chicken served with rice. I once again remembered Sushila, albeit she used to serve Rasam with Mutton Chops.

I've come to realize that I use the terms heavenly food, comfort food for the stuff that is similar to what I have eaten as a kid. No matter how the day, a good bowl of comfort food, and all seems okay. May be it reminds one of the good ol' days. This is one of those meals.


For the rasam :
Cooking time : 15 minutes
Preparation time : 5 minutes

Ingredients (Serves 4) :

  1. Tomato - 1 large quartered
  2. Garlic - 2 pods crushed
  3. Tamarind paste - 1 tsp
  4. Water - 2 cups
  5. Pepper powder - 1 tbsp
  6. Jeera/Cumin powder - 1tsp
  7. Oil/Ghee(preferred) - 1 tbsp
  8. Mustard seeds - 1 tsp
  9. Jeera/Cumin seeds - 1 tsp
  10. Curry leaves - 1 sprig
  11. Salt to taste


How I made it:

  1. In a pressure cooker, heat up one cup of water. 
  2. Add the tomato quartered. Cook on high till one whistle and turn of heat. 
  3. While the pressure releases from the cooker, heat 1 tbsp ghee in another pan.
  4. Add the mustard seeds and wait till they stop spluttering.
  5. Add the jeera, crushed garlic and curry leaves.
  6. When the garlic starts to brown at the edges, add the tamarind paste mixed with 1 cup of water.
  7. Mash the tomato in the water that it was boiled in and add it to the pan.
  8. Add the pepper powder, jeera powder and adjust the salt.
  9. Turn off heat once it comes to a boil.
  10. Garnish with coriander leaves and serve hot with rice or drink as a soup.


For the pepper chicken :
Cooking time : 30 minutes
Preparation time : 10 minutes

Ingredients (Serves 4) :

  1. Chicken - 500g
  2. Small/Pickling onion - 4
  3. Red onion - 1 small
  4. Garlic - 8 cloves
  5. Ginger - 2 inch piece
  6. Oil - 2 tbsp
  7. Pepper powder - 4 tbsp
  8. Salt to taste
  9. Red chilli powder - 1 tsp
  10. Coriander powder - 1 tsp
  11. Cumin powder - 1/2 tsp
  12. Turmeric powder - 1/2 tsp
  13. Water - 3/4 cup
  14. Curry leaves - 1 sprig

How I made it :

  1. Wash and marinate the chicken in salt, turmeric powder and 2 tbsp pepper.
  2. Grind the small onions, ginger, garlic, red chilli powder, coriander powder, cumin powder and 2 tbsp pepper powder to a paste with as little water as possible.
  3. Heat 2 tbsp of oil in a wide pan.
  4. Add the sliced red onions alongwith curry leaves and fry till light golden brown.
  5. Add the paste and fry until it stops sticking to the botton - usually 7-8 minutes on low to medium heat.
  6. Add the marinated chicken and fry till half cooked.
  7. Add water. 
  8. Adjust the salt. 
  9. Cover and cook till completely cooked. 
  10. If water remains, cover uncooked till water dries completely. We were too impatient to wait till the water dried and took it off heat in a semi gravy consistency.
  11. Garnish with chopped coriander and serve hot with rice and rasam.
This can also be had with rotis.

0

LIGHTing it up DOWN UNDER - err a bit late.

It's six months since I set foot in the land of the breathtakingly beautiful New Zealand. Time flies but the rollercoaster ride never ends. Well, things are mellowing down now but the initial settling phase was not as smooth as I had expected it to be. "Ignorance is bliss" is not something I used before but we all do learn and our eyes do eventually open up. No wonder we all look back at those times when we were most ignorant as the "best of times". Confused beings that we are, always wanting the good times but trying hard as ever to get ahead. Ha ha ha!

Six months and we move from my birthday to the birth of my nephew, exactly on Diwali. I smile when I think of the silence back at home on this otherwise unusually noisy day at my house. The hustle and bustle to decide who would go to distribute the sweets and if you had got all the people on the list of people to whom sweets need to be distributed, the packing of the sweets, the visits to the temple, the Lakshmi puja, the Saraswati puja, the Ganesha puja and the best drive around the town to get a glimpse of all the firecrackers for free. (wink)

Now, Diwali is known as the festival of lights but has many reasons for its significance. One is the return of the beloved Lord Ram from exile for which the lamps are lit and the night sky lit up with crackers to provide sufficient light for the returning lord, on a moon starved night. (Psst...Diwali usually falls on a new moon day). Another is to mark the end of another harvest season which brings us to the reason for this post. 

It is believed that as a sign of success and prosperity one must eat 7 vegetables on this joyful day and as this blog of mine focusses on recipes amongst other things, I made Sindhi Sai Bhaji with Bhuga Chawara. I ensured that I added as many veggies to the Sai Bhaji as possible. Fortunately for me, I got the quintessential ladies finger here in Auckland. Darn this place, you get a quarter of the veggies you get in India and even if you do get some, you have to buy them frozen. Grrr!!! (Ignorance is bliss until you move to a country only to realize what you have gotten yourself into.) Last year I had made Pav Bhaji with as many veggies.

Here's how we celebrated Diwali this year.

The quintessential start to my day - a cup of chai.

Bachpan ke din yaad dilaane waala lunch - sai bhaji and bhuga chawara - recipe below

Preparation Time : 5 minutes
Cooking Time : 12-15 minutes

Ingredients (Serves 2):
  1. 1 large onion finely sliced
  2. 1 cup of rice
  3. 1 stick of cinnamon
  4. 4 cloves
  5. 1 bay leaf
  6. 1/2 tsp red chilly powder
  7. 4 tbsp oil
  8. 2 cups of water
  9. Salt to taste
How I made it :
  1. Wash the rice and soak in water
  2. In a pressure cooker, heat the oil
  3. Add the whole garam masala - cinnamon, cloves and bay leaf
  4. Once the aroma spreads, add the onions and fry on medium low heat till the onions caramelize into a nice dark brown colour. Do not burn and the colour is essential for the dish.
  5. Add the red chilli powder and fry for a minute. 
  6. Add 2 cups of water.
  7. Add the rice once the water comes to a boil.
  8. Adjust salt. 
  9. Cover the pressure cooker and when the steam begins to rise, lower flame to minimum and leave for 8 minutes. 
  10. Turn off heat and serve with sai bhaji or dal fry.
A visit to the Diwali Fest held by the Auckland Council - good food and company and some of the best fireworks I've seen thus far.

Gulab Jamoons as they were getting ready


Sandalwood scented tea light candles adorning the corners of my house


0

Chocolate Chip Cookies

The course on haute cuisine that I have enroled in had the recipe of nestle tollhouse chocolate chip cookies and explains why you must stick to the recipe and try to exact the measurements specified. So, I decided to give it a try. The first time I made it with the exact directions and it turned out exactly like the cookies that I used to have at the Hilton in Roseville, California. I did feel really guilty eating those as they had loads of butter and sugar in them. I was happy that I had made a small batch of 15 cookies.

I was having two people, whom I am very fond of, visiting us this evening and so decided to make these cookies but decided to give them a little healthy twist. The result was different but good as well.


Preparation Time : 10 minutes
Cooking Time : 11 minutes
Equipment Required : Oven, egg beater/hand mixer
Source : http://allrecipes.com/recipe/original-nestle-toll-house-chocolate-chip-cookies
Ingredients (Makes about 24-30 cookies depending on size):

  1. Whole wheat flour - 1 cup + 2 tbsp
  2. Salt  - 1/2 tsp
  3. Baking powder - 1/2 tsp
  4. Baking soda - 1/2 tsp
  5. Chopped nuts - 1/4 cup
  6. Chocolate chips - 1/4-1/2 cup
  7. Vanilla essence - 1/2 tsp
  8. Unsalted butter - 1/4 cup melted
  9. Granulated white sugar - 1/4 cup
  10. Raw brown sugar - 1/4 cup
  11. Egg - 1 large
How I made it :

  1. Preheat oven to 190 degree C.
  2. Prepare the baking tray. I covered a cooling tray with aluminium foil and spread some flour over it.
  3. Sift together the flour, baking powder, baking soda and salt.
  4. Beat the sugars, vanilla essence and butter for 2 minutes on high.
  5. Add the egg and beat well till the mixture is creamy. I beat mine a bit too much such that the mix got quite thick. This gives it a more crumbly texture. 
  6. Add the mix from step 3 and mix till well combined.
  7. Shape into cookies, press in some nuts and chocolate chips. Now, if you had not beaten the egg stiff, you may have a moist dough. In that case, use a spoon to place spoonfuls on the baking tray and press in some chocolate chips and nuts.
  8. Bake for 11 minutes. 
  9. Cool for 30 minutes and store in airtight containers.
0

Ladies finger and mutton curry

There are a zillion different reasons that you will hear from Pras when asked why he chose to move to NZ and ONE out of all of those is "to eat as much lamb and beef as I can as this country is known for it". Well, how can I deny him his meat then?

So I had some ladies finger leftover from the diwali sai bhaji cooking and decided to use that up along with the lamb pieces that I had bought from the supermarket. Perfect mix of veggies along with meat proteins.

Note : As I type out the draft for this one, the heavenly aromas of the curry fill the air and we just can't wait to dig in. We are waiting for the pressure to release.

We ate this yummy dish with bread but it would go well with poori, rotis, parathas and rice as well.

Preparation time : 10 minutes
Cooking time : 45 minutes

Ingredients (serves 2):

  1. Large Onions - 2
  2. Mutton/Lamb - 500g
  3. Ginger - 2inch piece
  4. Garlic - 6 cloves medium sized
  5. Red chilli powder - 3 tsp
  6. Coriander powder - 1 tsp
  7. Garam masala powder - 1/2 tsp
  8. Turmeric powder - 1/2 tsp
  9. Black pepper powder  - 1/2 tsp
  10. Coriander leaves  - 2 sprigs with stem
  11. Mint leaves - from 1 sprig
  12. Medium sized Tomatoes - 3-4
  13. Ladies finger - 10-12
  14. Thick coconut milk - 1/4 cup
  15. Salt to taste
  16. Water - 1 cup
  17. Oil - 1/4 cup
How I made it :

  1. Finely chop the onions.
  2. Grind the ginger, garlic, dry powders, coriander and mint leaves together with as little water as possible.
  3. Wash and chop the ladies finger into 1 inch pieces. Fry them in a pan with a tsp of oil.
  4. In a pressure cooker, heat the oil
  5. Add the onions and fry till light golden brown.
  6. Add the mutton and fry till it turns colour and becomes lighter.
  7. Add the paste from step 2 and fry for about 5 minutes. 
  8. Add tomatoes and fry till they are soft and easily blend in.
  9. Add about a cup of water, adjust the salt and give 4-5 whistles on high.
  10. Once pressure releases, add the fried ladies finger and coconut milk.
  11. Boil for 2-3 minutes and serve hot.
0

Jo's Yummy Prawn Curry

How can one not try the seafood options available when living on an island? And we've been eating only red meat as NZ is well known for its red meat. I went shopping on my own this weekend and hence decided to pick up some prawns. I did wanna pick up some clams as well but put that away for the next time.

I made this curry in a hurry and with readymade coconut cream. It was delicious nonetheless and a match made in heaven when had with kerala appams. I used the double horse brand ready mix for easy palappams.

Also, please do excuse the lazy me as I continue to take the pics either after we've eaten our fair share for the day and with my humble phone camera.
Prawns in Coconut Curry

Preparation time : 5 minutes
Cooking time : 25-30 minutes

Ingredients ( Serves 4) :

  1. 500g of prawns - cleaned and deveined
  2. 1 large onion
  3. 4 sambar/pearl/pickle onions
  4. 4 cloves of garlic
  5. 1 inch piece of ginger
  6. 2 tsp red chilli powder
  7. 1 tsp coriander powder
  8. 400ml of thin coconut milk/cream (or) 200g of thick coconut cream diluted in water
  9. 1/2 cup of water + more for the coconut milk
  10. 1 tbsp tamarind paste
  11. 4 tbsp oil
  12. 1/2 tsp mustard seeds
  13. A handful of curry leaves
  14. Salt to taste
  15. Chopped coriander to garnish

How I made it:


  1. Grind the onions, pearl onions, garlic, ginger to a fine paste in the mixie.
  2. Heat oil in a pan.
  3. Add the mustard seeds when oil is hot.
  4. When they stop spluttering, add curry leaves. 
  5. Add the onion paste from step 1.
  6. Fry on medium flame for 10-12 minutes till the fat separates. It takes longer for this step to complete as onion paste takes some more time as well as more oil to fry well. 
  7. Add red chilli powder and coriander powder.
  8. Fry for a minute and then add the tamarind paste in 1/2 cup of water. 
  9. Let it boil for 3-4 minutes and add the coconut milk. 
  10. Adjust salt. 
  11. Once it comes back to a boil, add the prawns.
  12. Cook until the prawns turn pink. Do not cook beyond this else the prawns tend to get rubbery in texture.
  13. Turn off heat. Garnish with chopped coriander leaves and serve hot with rice or appams.

Now this is a keeper of a base for any kind of meat curry that needs to be made in a hurry.
1

Eggplant/Aubergine Pizza

As part of the cooking course assignment I had to get into the nutritional information of "prepared eggplant". I assumed there would be a recipe too and had bought this big chinese eggplant from the grocery store. There was no assignment but I had some leftover pasta sauce and hence decided to put that together with the eggplants to clean out the fridge. I had seen a similar dish in a colleague's lunchbox and decided to have a go at it. It was yummy and gone in minutes.

I made the aubergine two ways this time. 2 slices as below and the remaining I pan fried with Indian spices after seeing this recipe on a friend's blog. Both were delicious.

This recipe boasts of meeting almost all of one's dietary fibre intake for a day while being low on the calorie intake.


Preparation Time : 10 minutes
Cooking time : 40 minutes

Ingredients (serves 1) :
  1. 1 large Aubergine/Eggplant
  2. 4-5 button mushrooms
  3. 1 small sized onion finely chopped
  4. 2 cloves of garlic crushed
  5. 4 tbsp chopped bell peppers - I did not use this as my pasta sauce was a roasted bell pepper sauce
  6. 1/4 cup pasta sauce/tomato sauce - I used Roasted Peppers Dolmio Pasta Sauce
  7. A handful of grated cheese
  8. Salt to taste
  9. Pepper
  10. Olive oil - a drizzle
How I made it :


  1. Preheat oven at 180 degree C.
  2. Slice the eggplants lengthwise with the slices being about a cm thick.
  3. Slice the button mushrooms and mix with onions, garlic, pasta sauce.
  4. Adjust salt and pepper.
  5. Spread atop eggplant slices.
  6. Sprinkle with cheese.
  7. Place eggplant slices in ovenproof plate/pan.
  8. Drizzle olive oil on top of slices.
  9. Bake the eggplant slices for 30 minutes.
  10. Serve hot
2

Quickie Soup

There are days when you feel like you've eaten a very heavy lunch and are not too hungry for dinner but you still would like to have something light. This quickie soup is just the answer to those tiny rumbles in the tummy.


Preparation Time : Nil
Cooking time : 10 minutes

Ingredients (serves 2) :

  1. Vegetable stock - 2 cups - I used the water remaining from boiled chickpeas and some veggies that I had boiled for cutlets.
  2. 1 egg
  3. 1 dry red chilly broken into two
  4. 1 clove of garlic crushed
  5. 1/2 tsp vinegar
  6. 1 tsp olive oil
  7. Salt to taste
  8. Pepper to taste
How I made it :
  1. In a pan, put in the oil, red chilli and garlic.
  2. Turn on heat and fry till garlic starts to turn brown at edges
  3. Carefully pour in stock.
  4. Add vinegar.
  5. Adjust salt and pepper.
  6. Let this come to a boil.
  7. Beat the egg and pour the egg into the mix while stirring the soup.
Hot, wholesome soup is ready to be served.
1

Kerala Kadala Curry

Both Pras and I are morning people and so I'm always on the lookout for quickie breakfast recipes. I believe breakfast is a very important part of the day and should not be missed. Back in India, it was easier to manage breakfast with idlis, dosas, bread, cereal, oats and the occasional parathas on a weekday. Here, in Auckland, the idli and dosa batter is not available ubiquitously, the breads is quite different from what we get in India and hence the hunt for breakfast recipes is on.
Many people told me about the breakfast biscuits but nah, they aren't to our liking.  For a while I made rawa dosas and ran out of rawa/semolina. It takes some planning to get to the other side of town to purchase "Indian" groceries from the Indian supermarkets.

Anyhow, I decided to experiment and made this kadala curry to be served with thai rice noodles as a replacement for idiyappam. Except for the little bite to the noodles, it went quite well. So here's a big tick to this breakfast item.

Kadala curry is mainly made of chickpeas which are a high source of proteins. Since this recipe calls for the use of a pressure cooker as well as not discarding any of the water used, you should get the full benefits of the protein content. Serving this as an accompaniment to a rice based dish makes it a source of carbohydrates as well.

Preparation Time : 5 minutes if using store bought coconut milk, excluding time to soak the chickpeas
Cooking Time : 30-40 minutes

Ingredients (Serves 4):

  1. 1 cup black/dark chickpeas/kadala - washed and left to soak in water overnight
  2. 1 bay leaf
  3. 1 stick of cinnamon
  4. Water to boil the chickpeas
  5. Turmeric Powder - 1/2 tsp
  6. Salt to taste
  7. 1 medium sized onion chopped as finely as you can, need to go to extraordinary lengths
  8. 2 green chillis - slit
  9. Thick Coconut milk - 1/2 cup
  10. A pinch of asafoetida
  11. Red chilli powder - 1/2 tsp
  12. Coriander powder - 1 tsp
  13. Black pepper powder - 1/2 tsp
  14. Curry leaves - a stick or two
  15. mustard seeds - 1 tsp
  16. Oil - 1tbsp
How I made it :
  1. In a pressure cooker, put in all ingredients from 1 to 6. The water level should be about 1 inch above the chickpeas.
  2. Cook on high for one whistle and then low for 4 whistles.
  3. While the pressure releases, in another pan, heat 1 tbsp oil
  4. Once the oil is hot, put in the mustard seeds and cover till the mustard seeds stop spluttering.
  5. Add the curry leaves and split green chillies.
  6. After 30 seconds, add the onions and fry till they turn pink.
  7. Add the red chilli powder, pepper powder, coriander powder and asafoetida.
  8. After 30 seconds, add the chickpeas and any remaining water.
  9. If there is too much water, allow it to boil till the water reduces to required quantity.
  10. Add the coconut milk and once it comes to a boil, adjust salt and turn off the heat
Serve hot with idiyappam, appam, puttu or like me thai rice noodles.

7

Kumara and Chickpea Patties/Cutlets

This is one of my own experiments since I got "Down Under". It has been a hit with both friends and hubby alike. The best part - it is easy and Kumara aka Sweet Potato is of really good quality here.


P.S. I am yet to fully settle in to cooking in a smaller kitchen, so please excuse the lazy picture taken with my phone. But I urge you to try this recipe as it tastes really good.

Prepation time : 5 minutes
Cooking time : 10 minutes excluding time to pressure cook the chickpeas and kumara

Ingredients ( For 10 medium cutlets):
  1. 2 medium sized Kumara/Sweet potato
  2. 1/3 cup boiled chickpeas - soak overnight and boil in salted water, may be 2 whistles on high and 2 whistles on low in a pressure cooker
  3. 1.5 tbsp ginger garlic green chilly paste
  4. 1/4 cup finely chopped onion
  5. 1tsp garam masala powder
  6. 1/4 tsp amchur powder
  7. Oil for deep frying/shallow frying
  8. Salt to taste

How I made it :
  1. Boil the kumaras - 1 whistle on high in a pressure cooker will do.
  2. Peel and mash the kumaras.
  3. Add all the ingredients listed from 3 to 7 and mix well.
  4. Lastly add the boiled chickpeas.
  5. Shape into cutlets and shallow or deep fry as per preference. When deep frying, please ensure that the oil is very hot else it will just split.
You could serve these as a snack or make sandwiches or use them in pita pockets. Versatile and tasty.
0

Hoki Fish Curry - no coconut

Hoki fish is a part of the backbone of the NZ fishing industry. Unfortunately, it is one of those over fished varieties thanks to the corporate giant McDonalds. Now, though I may feel sad I can not control Pras who is like every other mallu, an ardent seafood lover. We had bought 500g of this beautiful fillet of hoki when we had gone to the super market and since I could not think of eating another sandwich (we've been eating a lot of bread these last few days), I decided to give it a go in fish curry.

I've seen my mother-in-law and co-sister make a similar curry except I did not have the quintessential kodumpuli for it. I used normal tamarind paste that I got at an Indian store here called "Cooking Without Mess" which is kind of true when it comes to extracting the tamarind paste.

Hubby's verdict : "Tript ho gaye baalak" which translates to "I'm content". I keep saying this to him after I have made something that reminds me of my childhood.


Cooking time : 20 minutes
Preparation time : 15 minutes (lesser if you multitask, explained below)
Equipment Required : Mixie if you don't have a mortar and pestle to make the ginger/garlic paste

Ingredients : (Serves 3)

  1. 500g fish 
  2. 1 large onion
  3. 2 large country tomatoes
  4. 1 tbsp ginger garlic paste
  5. 1.5 tbsp tamarind paste
  6. 2 cups of water
  7. 1 tbsp red chilli powder
  8. 1 tbsp coriander powder
  9. 1/2 tsp turmeric powder
  10. 1/2 tsp pepper powder
  11. 1 tsp fenugreek seeds
  12. 1 tsp mustard seeds
  13. A few curry leaves
  14. 1 green chilly
  15. 1 tbsp oil
  16. Salt to taste
  17. Coriander to garnish

How I made it :

  1. Chop the onions fine.
  2. Heat oil in a pan. 
  3. Add mustard seeds and fenugreek seeks to hot oil. Cover, lower flame and let them stop spluttering
  4. Once they stop spluttering, add curry leaves and 1 sliced green chilly.
  5. After 30 seconds, add the chopped onions.
  6. Lower the flame and get to cleaning the fish. Chop into 2 inch pieces.
  7. If you are using fresh ginger and garlic, use your mortar and pestle and smash them well. You could alternately, grind the ginger, garlic, red chilly powder, coriander powder, pepper powder, turmeric powder with a little water. 
  8. Once the onions are soft, takes about 5-6 minutes, add the ginger garlic paste.
  9. After 30-40 seconds of frying, add the powders and a little water.
  10. While this is frying on low flame, chop your tomatoes and add them to the pan.
  11. Fry till the tomatoes are well cooked and soft. 
  12. Add the tamarind paste in 2 cups of water.
  13. Adjust salt. 
  14. Let this boil till you can see a kind of froth or oil floating on the top.
  15. Put in your fish pieces. Ensure they are well covered with the water. Add more water if required. Cover and cook on low for 5 minutes or until the fish is cooked. Usually fish does not take long to cook. If you want a thicker curry, do not cover. As you can see mine is a little thin.
  16. Garnish with chopped coriander leaves and serve hot with rice.
0

Palak Panneer

This has been a long pending one as I keep forgetting to take a picture. Palak panneer is an absolute favorite especially with rotis and the punjabi papad. Now, there are many ways of making palak panneer and I prefer the method which prevents max loss of nutrients. At least I hope that is the case. (wink).


Love the greeeeen in the picture.

Difficulty level : Medium
Equipment required :  Food processor/blender/mixie

Ingredients :

  1. 1 large bunch of spinach
  2. 4 green chillies - this will make it spicy so adjust accordingly. Also, adjust if the bunch is small.
  3. 1 large onion finely sliced
  4. 1 large tomato
  5. 1/4 cup fresh cream/milk or coconut milk - this is my new find
  6. 1 cup panneer cubes
  7. 1 tbsp ginger garlic paste
  8. 1/2 tsp garam masala powder
  9. 1 tbsp + 1tsp  oil
  10. 1 stick of cinnamon
  11. Salt to taste
How I made it :
  1. In a pressure cooker, add washed spinach and green chillies. 
  2. Give one whistle. There is no need to add extra water as the spinach leaves water while it cooks. 
  3. In another pan, heat 1 tbsp oil and fry the onions till pink.
  4. Add the ginger garlic paste and let the raw smell go away. You could also use fresh pieces of garlic and ginger this will anyway be blitzed in the food processor/blender/mixie.
  5. Now add the tomatoes and cook till they go soft.
  6. Once the onion-tomato mixture cools down, add the spinach mix and blitz the whole thing in the blender/food processor.
  7. Heat 1 tsp oil in a pan. 
  8. Add the cinnamon stick. 
  9. Add the paste and panneer cubes.
  10. Mix well. Add the fresh cream or coconut milk. If using milk, check for consistency required. 
  11. Adjust salt and add garam masala.
  12. Cover and let it bubble for a couple of minutes.
  13. Serve hot with rotis and punjabi/sindhi papad.
Myth or fact : A papad takes 14 days to completely digest and get out of the system?
2

Quickie Sandwiches and Trek Grub

So we had planned to go on a trek and since most of New Zealand is protected by a lot of conservation laws, the requirement for the grub was that it had to be packed in hard plastic. Further, to take advantage of the early bird offer on the fuller's ferry to Rangitoto, we had to start from home by 6:30 am. Another thought that had been bothering me from quite a few days now is the fact that I have not been serving any raw veggies/salads. Yes, we do eat a lot of fruits but almost no raw veggies. Hence, decided to buy a pack of mesculun leaves and use them in sandwiches.

Ingredients ( for 4 sandwiches) :

  1. 8 slices of multigrain sandwich bread
  2. 4 slices of cheese
  3. 4 tbsp of mayonnaise
  4. 12 chorizo slices - I used 3 in each sandwich
  5. 4 handfuls of mesculun leaves or any lettuce that you may prefer
  6. Salt to taste
  7. Pepper powder to taste.

How I made it :

  1. Spread about a tbsp of mayo on half the slices. 
  2. Place a cheese slice on the top
  3. Next place as many chorizo slices as you like
  4. Top with washed mesculun leaves.
  5. Sprinkle salt and pepper.
  6. Cover with another slice of bread.

The sandwiches were yummy and fulfilling as trek grub. The spicy chorizo was a good fit for the Indian taste.
1

Stuffed Capsicum/Bell Peppers

The Bell Peppers need to be cooked through to really enjoy this dish.The stuffing can be modified as per one's taste. I was inspired to make these again after seeing Sunitha's blog. Sunitha has recently joined the blogging world. Her blog has a beautiful template and she does have an interesting collection of recipes.

Now, stuffed bell peppers are a definite hit if the stuffing tastes great. It's just like most of the other chaat items - samosa, kachori.
partially stuffed bell peppers

All ready to be eaten with dal and roti

Just before they were zapped in the microwave
Equipment used :
  • Gas
  • Microwave
Time taken :
Preparation time : 10 minutes
Cooking time : 30 minutes including time to boil potatoes
Difficulty  : Easy

Ingredients (serves 4):
  1. Green bell peppers/capsicum - 2
  2. 3 large potatoes
  3. 1/2 cup green peas
  4. 1 onion chopped
  5. 1 tsp ginger garlic paste
  6. 1 tsp oil + a little more to coat on the bell peppers
  7. 1 tsp saunf/fennel seeds
  8. 1 tbsp kasuri methi
  9. 1/2 tsp red chilli powder
  10. 1/2 tsp cumin powder
  11. 1/2 tsp coriander powder
  12. 1 tsp garam masala
  13. 1/4 tsp amchur powder
  14. 2 tbsp chopped cashew bits (optional)
  15. A few raisins chopped (optional)
  16. Salt to taste
  17. 4 tbsp grated cheese
How I made it :
  1. Slice the bell peppers into two lengthwise. Deseed them. These will serve as our cups. Spread oil on the outer side of the cups.
  2. Boil the potatoes till completely cooked. 
  3. Peel the potatoes and mash.
  4. In a pan, heat oil.
  5. Add the saunf seeds and kasuri methi.
  6. Add the onions once the saunf starts to brown.
  7. If using frozen peas, cover with water and zap in microwave for 2 minutes. If using fresh peas, zap for longer.
  8. When the onions are translucent, add the ginger garlic paste.
  9. When the raw smell goes away, add the green peas.
  10. After a minute, add the red chilly poweder, coriander powder, cumin powder, amchur powder and garam masala powder.
  11. Adjust salt.
  12. Add mashed potatoes.
  13. Fry for a minute.
  14. Turn off heat. Divide the mixture into 4.
  15. Put each part into a capsicum cup. Sprinkle with cheese on top.
  16. Zap in microwave on high for 10 minutes, until the skin starts to wrinkle.
  17. I optionally placed them after zapping on my hot tawa, which was ready for rotis, for two minutes covered. This helps give it a char enhancing the taste.
1

Tomato Dal

My friend brings this dish quite often and it is mouth-wateringly delicious. It is an amazing way to transform the simple dal.
Tomato Dal with rotis in my newly acquired soup bowls
Ingredients :

  1. 1/2 cup toor dal
  2. 2 tbsp masoor dal
  3. 2 large tomatoes
  4. A tiny piece of tamarind
  5. 1/2 tsp turmeric powder
  6. Salt to taste
  7. 1 tsp oil
  8. 1/2 tsp mustard seeds
  9. 1/2 tsp cumin/jeera seeds
  10. 2 tbsp chopped onions
  11. 2 pods of garlic crushed
  12. A pinch of hing/asafoetida
How I made it :
  1. Pick, wash and soak the toor and masoor dal for ten minutes.
  2. In a pressure cooker, add the dal, sufficient water, tomatoes chopped, tamarind, salt and turmeric powder.
  3. Let this boil for one whistle on high and about 4-5 whistles on low.
  4. When pressure releases, heat one tsp oil.
  5. Add the mustard seeds and cumin seeds.
  6. When the mustard stops spluttering, add the onions and garlic.Fry till onions are translucent.
  7. Mix the dals well and add to the tadka. 
  8. Garnish with chopped coriander and serve.
We had it with rotis and stuffed capsicum. This recipe is a definite keeper. You can avoid the tamarind, if you don't like the sourness it imparts.
1

Taste of South India - 3 recipes in one post

Horsegram also known as kollu is known to help with weight loss and is also supposed to be very good for women to keep their bones strong. It is generally considered to contribute to body heat.  The last time I had tried a rasam with this gram, it was quite a flop. This time I tried it differently and it came out awesome. What's more nothing is wasted. The boiled gram makes a palya and the water in which it is boiled is made into a rasam. On the side, I also made some beetroot palya.

Beetroot Palya :
Equipment Used : grater, coconut scraper

Difficulty : Medium

Time taken :
Preparation time : 10 minutes
Cooking time : 15 minutes

Ingredients : 

  1. 2 medium beetroots grated
  2. 1 tsp oil
  3. 1 tsp mustard seeds
  4. 1 green chilly chopped
  5. Salt to taste
  6. 2-3 tbsp fresh grated coconut

How I made it :
  1. Grate the beetroot.
  2. Heat oil in a pan.
  3. Add the mustard seeds
  4. Once they stop spluttering, green chillies and fry for a minute
  5. Next add beetroot.
  6. Adjust salt.
  7. Cover and cook on low heat for 15 minutes, mixing once in a while.
  8. Garnish with grated coconut and serve.
Horsegram/Kollu Palya :
Equipment Used : coconut scraper

Difficulty : Easy

Time taken :
Preparation time : Soaking time
Cooking time : 15 minutes to boil + 5 minutes

Ingredients : 

  1. 1/2 cup horsegram soaked overnight
  2. A pinch of turmeric powder
  3. A pinch of asafoetida powder
  4. 1 tsp oil
  5. 1 tsp mustard seeds
  6. Salt to taste
  7. 2-3 tbsp fresh grated coconut

How I made it :
  1. Boil the horsegram with salted water enhanced with turmeric and asafoetida powders. This takes about 15 minutes. One whistle on high and about 2 whistles on low.
  2. When pressure releases, drain and reserve the water. It will be used to make rasam.
  3. Heat oil in a pan.
  4. Add the mustard seeds.
  5. Once they stop spluttering, add the horsegram.
  6. Fry for  minute.
  7. Add grated coconut. Turn off heat and serve.
Horsegram/Kollu Rasam :
Difficulty : Easy

Time taken :
Preparation time : Soaking time of horsegram
Cooking time : 15 minutes to boil + 5 minutes

Ingredients : 

  1. 1 country tomato roughly chopped
  2. 1 lemon sized ball of tamarind
  3. The reserved water from the boiling of the kollu.
  4. 1 tbsp pepper powder
  5. 1 tbsp cumin powder
  6. 1 tsp oil
  7. 1 tsp mustard seeds
  8. 1 whole red chilly
  9. 1 pod of garlic crushed (optional)
  10. Salt to taste - be careful as the kollu water has some salt
  11. Asafoetida - a pinch, be careful as some was added to the kollu water
  12. Chopped coriander leaves

How I made it :
  1. In a vessel, boil the tamarind and tomato in about 2 cups of water. Let that simmer away for about 10 -15 minutes till tomato is extremely soft.
  2. Now, you can strain this liquid or you could just remove the tamarind pulp.
  3. Add the reserved kollu water to this.
  4. Heat oil. 
  5. Add the mustard seeds and let them splutter.
  6. Add asafoetida powder.
  7. Add the whole red chilly and garlic and fry for 30 seconds
  8. Pour in the water mixture.
  9. Add salt, pepper powder and cumin powder.
  10. Let this come to a boil. 
  11. Turn off heat, add chopped coriander and serve hot with rice.


    1

    Layered Pasta bake with broccoli

    I got to buy some fresh broccoli over the weekend. I was thinking of making a broccoli pesto sauce that I had seen while food gawking on the internet. Since I have run out of any kind of nut that I could use in the pesto, I decide on making a pasta bake. The alternate was a quiche but that would mean having to see the pack of pasta lying as is.

    Broccoli is one vegetable that I've seen in the exotic section of every super market. This veggie is actually found so easily in the local market in Ooty and at a much cheaper price. Earlier I used to refuse to reach out for it cause of the exorbitant MRP displayed. Now, as I keep trying out different dishes and like to choose different veggies, this gets into the basket once in a while.

    Broccoli has a very high iron content and I've seen it in many forms in the dabbas of pregnant and anaemic women. When buying broccoli, stay away from the ones which are turning brown at the tips of the florets.

    Now, when it comes to this dish, the seasoning is all that matters. So ensure you add sufficient salt and pepper.

    Equipment used :

    • gas stove
    • convection bake option in combination microwave
    • round cake tin
    Difficulty : Easy

    Preparation time : 15 minutes
    Cooking time : 25 minutes + 30 minutes for baking


    Ingredients (Serves 2 as main course):

    1. 1/2 cup of macaroni shell
    2. 1/4 cup milk
    3. 2 eggs
    4. 1 head of broccoli
    5. 1 largeonion chopped
    6. 4 tomatoes chopped
    7. 1 large pod of garlic chopped finely
    8. 1 tbsp butter
    9. 1 tsp olive oil
    10. 2 tsp pepper (adjust according to taste)
    11. 1/4 cup or more of grated cheddar cheese
    12. Breadcrumbs - optional
    13. Salt to taste
     How I made it :
    1. Cook the pasta as per the instructions on pack. Reserve the hot water.
    2. Put florets of broccoli into the hot water, while you chop onions, garlic and tomatoes.
    3. In a pan, put in the garlic, butter and oil.
    4. Turn on the flame and let the butter melt and oil get heated up.
    5. Put in the onions and fry till translucent and pink.
    6. Add the tomatoes and cook till soft.
    7. Add the broccoli florets without the water. Discard the water now.
    8. Add salt and pepper and let the broccoli cook. Turn off heat when the broccoli is 80% cooked.
    9. In another bowl, beat the eggs and add milk. Add a little salt and pepper.
    10. Preheat oven at 180 degree C
    11. In a cake tin, layer with pasta.
    12. Next put the broccoli mix.
    13. Next sprinkle the cheese, as much as you like.
    14. Pour over the egg and milk mixture.
    15. I had some bread crumbs which I sprinkled on the top. This can be avoided. 
    16. Bake for 30 minutes until top is golden brown.
    17. Serve hot with tomato ketchup.
    6

    150th post - back to my roots - Sai Bhaji with Kichdi

    Finally my 150th post, but not necessarily my 150th recipe. I decided to get to my roots and make the famous Sai Bhaji with Kichdi. This combination is absolute comfort food, especially when served with fried potatoes on the side.

    Sai bhaji is similar to a keerai masiyal but has added vegetables like carrots, ladies finger, brinjals and potatoes.
    The Kichdi is a simple rice dish wherein green mung dal is added to the rice alongwith some turmeric powder.

    Ingredients for the sai bhaji :
    1. 1 bunch paruppu keerai/spinach
    2. 1 small handful of chana dal picked, washed and soaked for 1 hour or toor dal
    3. 1 tsp kasuri methi or small handful of fresh methi leaves
    4. 1-2 green chilly
    5. 1 tsp jeera seeds
    6. 1 large potato cubed
    7. 4 small brinjals cubed
    8. 5-6 ladies finger cut into 2 inch pieces
    9. 1 carrot cut into roundels
    10. 1 onion chopped
    11. 2 large tomato chopped
    12. salt to taste
    13. 1+1 tsp oil
    14. 1/2 tsp red chilli powder
    15. 1 tsp coriander powder
    16. A pinch of asafoetida
    17. 1 tsp Garam masala (optional)

    How I made it :
    1. In a cooker, heat a tsp of oil.
    2. Put in jeera seeds. Fry for a minute till they change colour.
    3. Add the green chilly. 
    4. After 30 seconds, add the onions.
    5. When the onions turn pink, add the veggies. Fry till the brinjals are 80% cooked.
    6. Add the tomato.
    7. When tomato is soft, add the dal and fry for a minute or two.
    8. Add the spinach chopped and enough water to cover everything.
    9. Adjust salt and give one whistle on high and 2-3 whistles on low.
    10. When pressure releases, mix well, mashing some of the potatoes.
    11. In tadka pan, heat one tsp of oil, add red chilly powder and asafoetida. Pour this on top of the spinach dal mixture. Ideally garam masala will be added too. I did not have any so skipped adding it. 
    12. Serve hot with kichdi or bhuga chawara
    2

    Channa/Chickpea Pulao

    What do you do when you have some channa but not enough to make sufficient chole masala? I decided to make channa pulao. Usually, I'd make this from the leftover chole masala. This is a simple crockpot meal with most of the ingredients found around the kitchen.

    Time taken :
    Preparation : 10 minutes + time for soaking
    Cooking time : 30 minutes(for chickpeas) + 15 minutes

    Difficulty : Easy

    Ingredients (Serves 2) :

    1. 1/2 cup chickpeas soaked overnight
    2. 1 cup rice washed
    3. 1 large onion sliced finely
    4. 2 medium tomatoes finely chopped
    5. 1 tbsp ginger garlic paste
    6. 1 tbsp oil
    7. 1inch cinnamon stick
    8. 4 cloves
    9. 1 bay leaf
    10. 2 tbsp chole masala
    11. 1/2 tsp red chilli powder
    12. 1 tsp lime juice
    13. Salt to taste
    14. Water - 2 cups for the rice + 4 cups to boil the chickpeas
    15. Chopped coriander
    How I made it :
    1. In a pressure cooker, boil chickpeas with 4 cups of water with salt. Give one whistle on high and about 5-6 whistles on low or about 20 minutes on low. This ensures that they are well cooked and soft. Drain any remaining water.
    2. In another the pressure cooker, heat oil.
    3. Add the cinnamon stick, cloves and bay leaf.
    4. Once the cloves start bursting, add the onions.
    5. Fry the onions till dark golden brown. This is what gives the colour as well as imparts some taste.
    6. Add the ginger garlic paste and fry till raw smell goes away, about 2 minutes. 
    7. Add the tomatoes and fry till soft.
    8. Add the red chilly powder, chole masala, salt. Fry for a minute.
    9. Now, add the rice and fry for a minute.
    10. Add the water and the boiled chickpeas.
    11. Adjust salt. Add lime juice.
    12. Let it come to a boil.
    13. Cover the cooker and when the steam starts to build, lower the flame and cook on low flame for 8 to 10 minutes. 
    14. Garnish with chopped coriander and serve hot.

    0

    Upcycled cabbage dal and raw banana cheela

    One of the more recent blogs that I've been exposed to is http://litebite.in/. I was thrown away by the photos. Sanjeeta has a way with photos, that something not so healthy as a bread pakora too looks like it has to be made right away. The health conscious part of me decided upon the raw banana cheela and I bought that right that evening while picking up veggies.


    Unfortunately for me, I had some cabbage dal leftover in the fridge. Now cabbage dal is a crockpot dish which my husband calls hotchpotch and usually does not dig into. So, this time too it was leftover and I decided to upcycle it.

    Ingredients (serves 2) :

    1. Raw banana - 1 cup peeled and grated
    2. 1/2 cup gram flour/besan
    3. 1/2 cup leftover cabbage dal or plain dal
    4. 1 tsp red chilli powder
    5. 1tbsp curd
    6. chopped coriander leaves - I didn't have any on hand
    7. 1/4 tsp turmeric powder
    8. 1/2 tsp garam masala powder
    9. salt to taste - watch it as your dal will be salted too
    10. Oil
    How I made it :
    1. Add the curd to the raw banana to prevent it from browning
    2. Add all the other ingredients to the raw banana mix.
    3. If your dal is too thick, add water. Please refer the consistency shown in the picture on the side.
    4. Heat a tawa.
    5. Add a tsp of oil.
    6. Scoop a spoonful of batter and place on the tawa.
    7. Dip your hand in water and spread it around.
    8. Cook on low till you see the sides starting to turn dry.
    9. Flip it. And cook till it turns brown.
    10. Serve hot with tomato ketchup.
    0

    Pavakkai/Bitter gourd Kara Kuzhambu

    My belief is, some pavakkai once in a while is good for the body to help it detox. Now, I don't believe in de-bittering the bitter gourd by salting it as I feel it takes away some of its goodness. I don't know how true all this is but it makes me feel good to be eating something bitter. It feels like redemption after having eaten all those chocolates and other goodies eaten almost everyday.


    I had made some dosa batter too and so we had it with dosas. This has a tang to it and Pras loved it because of that. To cut the bitterness of the bitter gourd, this has coconut and the sweetness of fennel seeds. I've learnt from a good friend that it is all about balance.

    Ingredients (Serves 4) :

    1. Bitter gourd - 1 large or 2 small cut into roundels
    2. 3 small country tomato or 1 large tomato
    3. 1 small onion finely chopped
    4. 1tsp mustard seeds
    5. 1+1tsp oil
    6. 1 lemon sized ball of tamarind soaked in warm water
    7. 1/4 cup coconut
    8. 2tsp fennel seeds
    9. 6 red chillies
    10. 1 tsp coriander powder
    11. 1tbsp jaggery - optional
    12. chopped coriander leaves
    13. Salt to taste
    How I made it :
    1. In a kadai, heat 1 tsp oil and fry the bitter gourd till 80% cooked. I try to cut through with the ladle and if it gives in without much effort, I know it is almost done.
    2. In a mixie, grind the coconut, fennel seeds, coriander powder and red chillies with enough water to get a fine paste.
    3. In a pressure cooker, heat 1 tsp oil.
    4. Put in mustard seeds and let them splutter. Cover with lid to avoid them from getting everywhere
    5. Add the onions and fry till pink and translucent.
    6. Add the ground mix from 2. Fry for 4-5 minutes on low.
    7. Add chopped tomatoes. Fry till soft.
    8. Add tamarind water extract.
    9. Cover the cooker and give abour 3-4 whistles on high.
    10. When the steam releases, add the fried bitter gourd. Adjust salt. Add water to get curry of desired consistency and let it boil for about 3 minutes.
    11. Add the chopped coriander.
    12. Serve hot with rice or dosas.

    2

    Vermicelli/Semiya Idli

    I've been trying to empty out my kitchen and one thing that I had a lot of stock of was vermicelli. I made a sweet version of it last week and this morning I made vermicelli idli. I'd heard of vermicelli idli as my sister-in-law makes it sometimes. I've not tasted it but my mom has told me about it. The idli is similar to a rava idli and actally has some rava too.

    Now this idli is a bit on the heavy side because it is full of curd. It can be served with coconut chutney or some podi.

    Ingredients (Makes 6 idlis) :

    1. 1 cup vermicelli
    2. 1/2 cup rawa/semolina
    3. 3/4 cup curd + extra as required
    4. salt to taste
    5. 1 tsp + 1 tsp oil
    6. 1 tsp mustard seeds
    7. 1 tsp channa dal
    8. 1 tsp urad dal
    9. 1 finely chopped green chilly
    10. chopped cashew bits - as desired
    11. chopped coriander leaves
    12. finely grated coconut - skip this if serving with coconut chutney
    How I made it :
    1. Heat 1 tsp oil.
    2. Fry rawa and vermicelli for 5 minutes. Keep stirring to ensure uniform roasting.
    3. Once cooled, add curd and leave aside.
    4. After 1 hour, add some more curd if too thick. I added 2 tbsp curd extra. I added 2 tbsp of water as well. 
    5. In a pan, heat 1 tsp oil
    6. Add the mustard seeds.
    7. Once the mustard seeds stop spluttering, add the urad dal, channa dal and cashew bits. 
    8. Fry for a minute. 
    9. Add this seasoning to the batter. 
    10. Add green chillies, coriander and coconut. 
    11. Adjust salt.
    12. Grease idli mould or small ramekins and steam for 10 minutes.
    I don't have an idli stand. I make my idlis in katoris/stainless steel kinnams.
    0

    Stuffed Eggplant Recipe

    Well, I wanted to use up the brinjal as well as cabbage lying in the fridge but could not zero in on one recipe that used both. I finally remembered the walnuts that I had and decided to make this recipe. I made cabbage sambar with the cabbage. Though the original recipe calls for the bigger variety, I made it with the small striped brinjals. The dish has a lot of texture to it because of the walnuts and the combination of the walnuts along with the brinjal is superb. I love walnuts and my dad sends me walnuts from his friend's farm in Ooty. Walnuts are supposed to be good for memory they say. Is it because they're similar in shape to the brain? But they are supposed to be loaded with Omega 3 fatty acids.

    Ingredients :

    1. 6 small striped purple brinjals
    2. 1 medium sized onion finely chopped
    3. 1 large tomato finely chopped
    4. 1/4 cup walnuts chopped coarsely
    5. 1/2 tsp red chilli powder
    6. 1/4 tsp garam masala powder
    7. 1/2 tsp cinnamon powder
    8. 1 tsp + 1tbsp olive oil
    9. Salt to taste
    10. Coriander leaves chopped - 1 tbsp
    11. 30g cheddar cheese grated
    12. Bread crumbs made from one slice of fresh bread - just blitz in the mixie jar.

    How I made it :

    1. Wash brinjal. Halve them.
    2. Remove as much of the core that you can into another bowl. Keep aside to chop finely later.
    3. Place the brinjal shells in salted water with the skin side up and boil for 5-6 minutes or until the skill is soft to touch and feels like it will break easily. This is important else you could get chewy shells which would destroy the dish. Drain, pat dry and keep aside.
    4. Heat 1 tsp olive oil in a pan.
    5. Add the onions. Fry till they turn pink and translucent.
    6. Add the chopped brinjal centers.
    7. After 2-3 minutes add the tomatoes. Fry till the brinjal is almost cooked. About 6 minutes. 
    8. Add the red chilli powder, salt, garam masala and cinnamon powders.
    9. Throw in the walnuts and fry till the brinjal is cooked completely.
    10. Turn off heat and mix in coriander leaves. 
    11. Now dip the eggplant shells in 1tbsp oil and put in oven with skin side down for about 3 minutes. I set the oven to 200 degree C and placed the shells in the topmost rack. 
    12. Spoon in the mixture. Sprinkle bread crumbs and grated cheese.
    13. Bake in oven for 20 minutes at 150 degree C or until cheese has melted and is brown on top.

    Tips :
    1. To ensure that you do not get a chewy shell, boil with skin side up. 
    2. When pre-cooking in oven, place the shells with skin side down to avoid getting a chewy texture.
    3